
No handshakes, no design center visuals, and no hard copy documentation. If this were a traditional design center experience, it would mean that something was very wrong. Since it is a virtual design appointment, it simply means that importance must be placed on other elements.
Virtual design appointments can be just as impactful as traditional face-to-face appointments. When employing the right strategies before, during, and after your virtual design appointment, you can ensure your clients have an engaging, high-quality experience. Here is a list of 8 steps designers can use to make they host great virtual design appointments with every home buyer.
Before the Appointment
- Send Your Clients Conference Tips
While you have probably been hosting and joining virtual meetings for the last few months, it is very likely that this is the first virtual design experience for your client. They may be older, not as technologically advanced, or simply unaware of the specific conferencing software you are using. Unless your virtual design appointment will consist of nothing other than a phone call, you are best served in sending your clients a quick “How to Use X Conferencing Software” article or video when you send them the appointment invitation.
2. Gather All the Tools You May Need
Since you do not have the luxury of being in the design center with your clients, you must be prepared to show examples of your work and what you are referring to in other ways. Since we work in lighting, we have created a simple online brochure to showcase various lighting design techniques. We have also created an online product guide that we reference when speaking about the benefits and features of various items. If there are certain products people are always curious about or questions that get asked often, have photos available in a folder on your desktop or saved to your bookmarks.
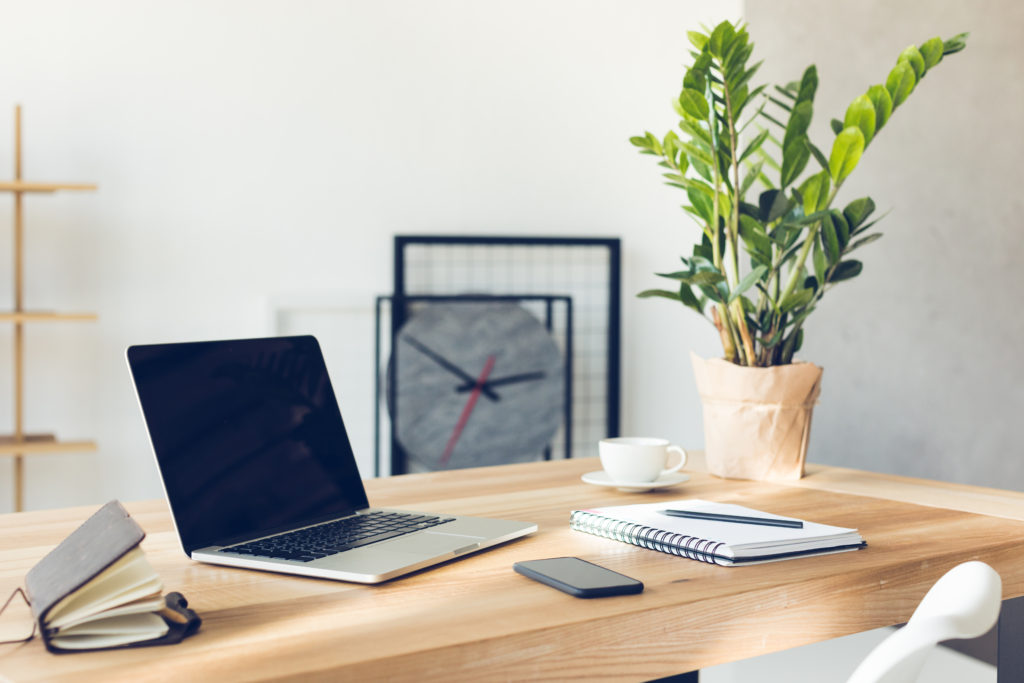
3. Set Up the Perfect Environment
Whether or not your virtual design appointment will include video, you need to set up the perfect environment. Ensure your space will be free of noise and that you have everything you might need on the call within arm’s reach. If using video, make sure there is nothing in the background that may be too distracting. To get the best video and sound, you should be two to three feet away from your camera.
During the Appointment
4. Start Off with a Quick Introduction
While there may not be any handshakes, you can still make use of the first few minutes of your virtual design appointment to introduce yourself. Share why you are passionate about design, how long you have been in the industry, and anything else you find relevant. Get to know a bit about your client and how they are feeling about the design process thus far. Let them know that you are here to make their experience the best one yet.
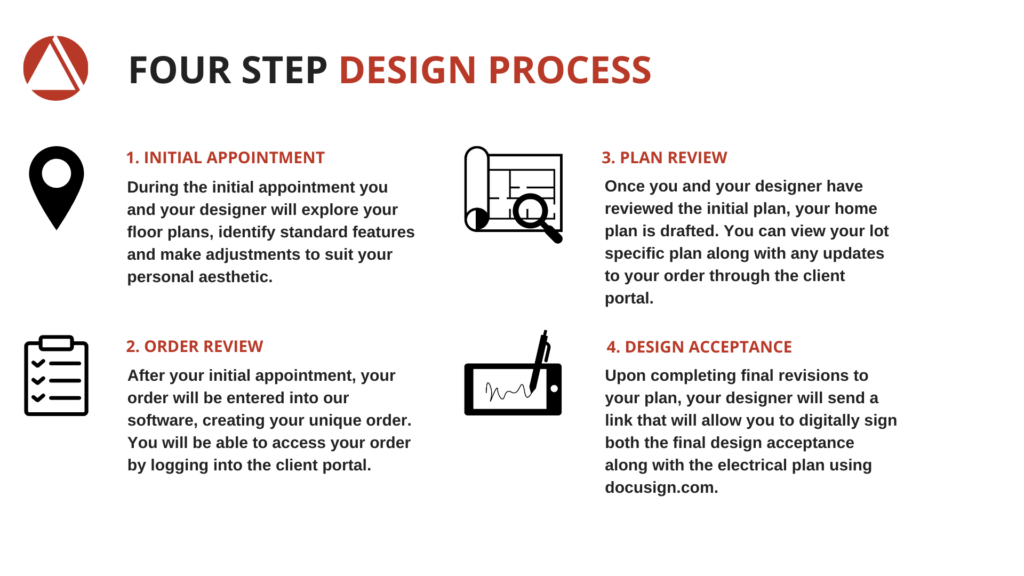
5. Use a Simple Visual for Your Process
You know the ins and outs of your company and the design process. But how to explain it quickly and concisely without causing confusion? This is where a simple visual or graphic of your design process would be perfect. At Aterra Designs, we have created a 4 Step Process from the first initial appointment to the final signing of the lighting design selections. Below is the one we created.
6. Be the Designer – Design Concepts, Do Not Sell Products
This may be our sixth step, but really it is the step which oversees everything. From the moment you have your first piece of communication with your client to the moment they are happily living in their new home, you are their designer – you should never be their salesperson. Designers work with concepts and techniques to create masterpieces within each home. If your focus is on increasing product quantity, you are not behaving as a designer. Create beautiful designs and the money will follow.
7. Perform a Virtual Walk-Through of Next Steps
When it comes time to wrap up your virtual design appointment, remind your home buyer of all the steps you covered and then walk them through their next steps. There are likely several items you will need to follow up with them about and some things they may still be deciding on themselves. If you have a client portal for them to access, take the last few minutes to log into their portal while you are still sharing your screen with them. Show them where the most important items will be so that they do not feel lost when it is time to log in.
After the Appointment
8. Send a Follow-Up Email with Clear Expectations
Although you already walked your client through their next steps at the end of your appointment, make sure your follow-up is detailed. This is not the only appointment your home buyer is having, and they could probably use some help keeping everything together. Provide a quick summary of what you discussed and any pdfs that may be helpful, as well as steps to log into their client portal again. Be sure to set clear expectations as to when they will be hearing back from you and what you need from them in the meantime.

If you follow these 8 steps, each of your home buyers will have a great virtual design experience. It is important to keep in mind that what you do before and after your virtual design appointments is just as impactful as what you do during the actual appointment.
At Aterra Designs, we have over 20 years of experience working remotely with home buyers and are constantly looking for ways to better our appointments. Our latest strategy was creating a virtual lighting design tool so home buyers can see their lighting selections in 2D and 3D panorama.
If you would like to take your lighting design experience virtual, reach out to luminosity@aterradesigns.com for help.
